【UnityShader】お絵かきシェーダー【3】 #55
前回の成果
極座標を使用して、お絵かきをした。
今回やること
引き続き、お絵かきシェーダーを学んでいきます。
事前準備
Scene上にQuadを配置します。

ソースコード
Shader "Unlit/Drawing_1" {
    Properties {
        _MainTex ("Texture", 2D) = "white" {}
    }
    SubShader {
        Tags { "RenderType"="Opaque" }

        Pass {
            CGPROGRAM
            #pragma vertex vert
            #pragma fragment frag

            #include "UnityCG.cginc"

            struct appdata {
                float4 vertex : POSITION;
                float2 uv : TEXCOORD0;
            };

            struct v2f {
                float2 uv : TEXCOORD0;
                float4 vertex : SV_POSITION;
            };

            sampler2D _MainTex;
            float4 _MainTex_ST;

            v2f vert (appdata v) {
                v2f o;
                o.vertex = UnityObjectToClipPos(v.vertex);
                o.uv = TRANSFORM_TEX(v.uv, _MainTex);
                return o;
            }

            fixed4 frag (v2f i) : SV_Target {
                return float4(i.uv.x, i.uv.y, 0, 1);
            }
            ENDCG
        }
    }
}
このソースのフラグメントシェーダー部分を変えていきます。
歪み
円を描画し、その円に渡す座標をズラしてあげることによって歪みを生じさせます。
円を描画
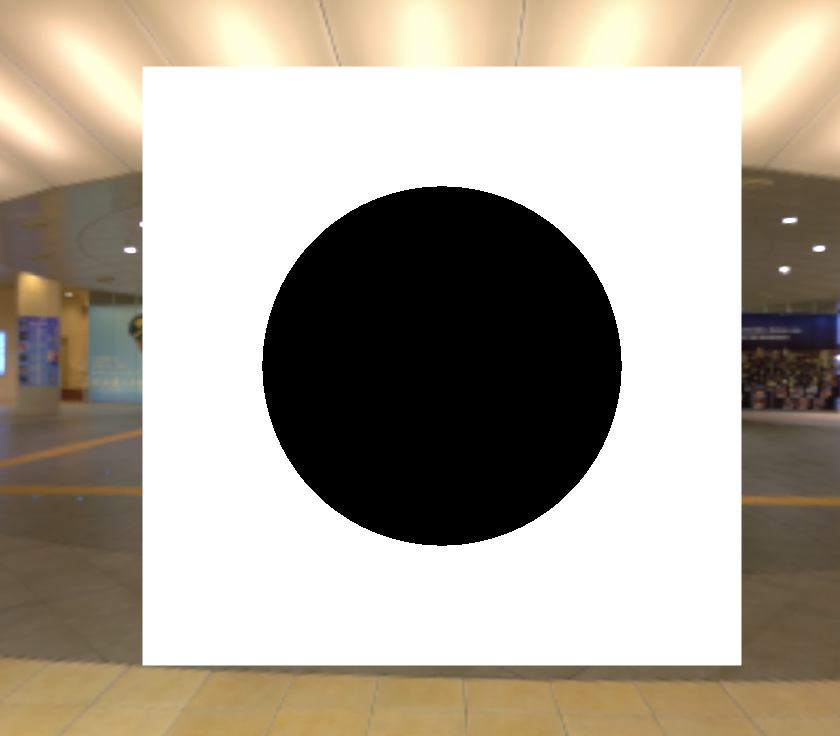
まずは円を描画します。
ソースコードと結果は以下になります。
ソースコード
float circle(float2 uv) {
    return step(0.3, distance(0.5, uv));
}

fixed4 frag (v2f i) : SV_Target {
    return circle(i.uv);
}
結果

円を歪ませる
円を描画する際にcircle関数の引数としてuv座標をそのまま渡しました。
このuv座標を変化させてあげることにより円を歪ませることができます。
今回の場合、y座標を20倍してサインカーブしたものを0.05で乗算してあげています。
それをuvのx座標に加算することによって歪みを表現しています。
sin(x * 20) * 0.05のグラフ

上記の値をuvのx座標に加算しています。
ソースコード
float circle(float2 uv) {
    return step(0.3, distance(0.5, uv));
}

fixed4 frag (v2f i) : SV_Target {
    float2 uv = i.uv;
    uv.x += sin(uv.y * 20) * 0.05;
    return circle(uv);
}
結果

他の歪み
参考サイト様には他にも様々な歪ませ方をされているので参考に添付させて頂きます。
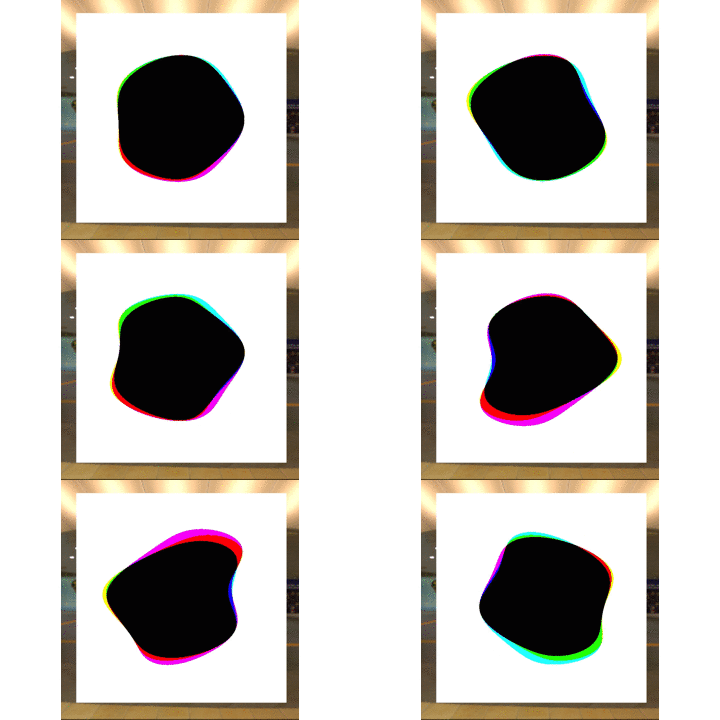
円をアニメーションさせて歪ませる
ソースコード
float circle(float2 uv) {
    return step(0.3, distance(0.5, uv));
}

fixed4 frag (v2f i) : SV_Target {
    float2 uv = i.uv;
    float x = 2 * uv.y + sin(_Time.y * 5);
    float distort = sin(_Time.y * 10) * 0.1 * sin(5 * x) * (-(x - 1) * (x - 1) + 1);
    uv.x += distort;
    return float4(circle(uv - float2(0, distort) * 0.3),
                    circle(uv + float2(0, distort) * 0.3),
                    circle(uv + float2(distort, 0) * 0.3),
                    1);
}
結果

グリッド
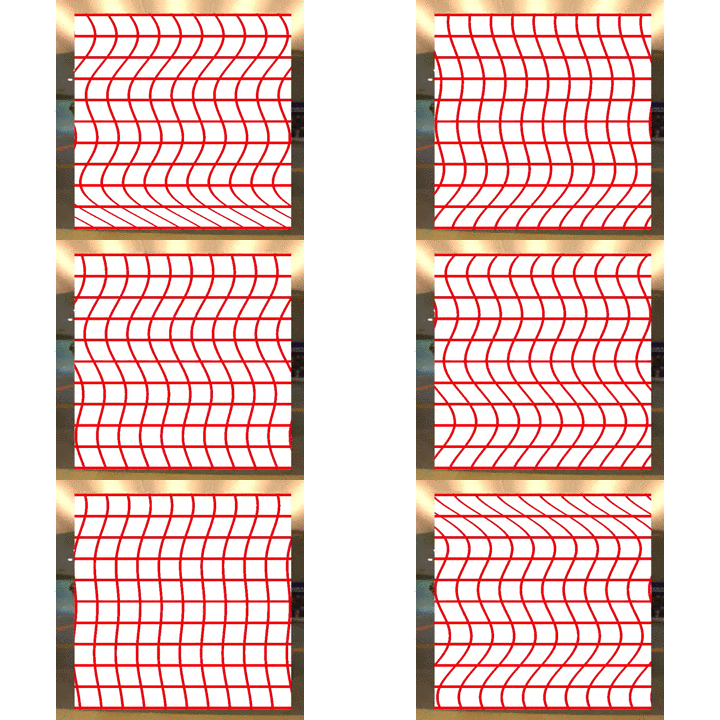
グリッドを使用して、揺れをわかりやすくしてみます。
ソースコード
Shader "Unlit/Drawing_7" {
    Properties {
        [NoScaleOffset]_MainTex ("Texture", 2D) = "white" {}
        _LineColor ("Line Color", Color) = (1, 1, 1, 1)
        [IntRange] _SplitCount ("Split Count", Range(1, 30)) = 10
        _LineSize ("Line Size", Range(0.01, 1)) = 1
    }
    SubShader {
        Tags { "RenderType"="Opaque" }

        Pass {
            CGPROGRAM
            #pragma vertex vert
            #pragma fragment frag

            #include "UnityCG.cginc"

            struct appdata {
                float4 vertex : POSITION;
                float2 uv : TEXCOORD0;
            };

            struct v2f {
                float2 uv : TEXCOORD0;
                float4 vertex : SV_POSITION;
            };

            sampler2D _MainTex;
            float4 _MainTex_ST;
            fixed4 _LineColor;
            float _SplitCount;
            float _LineSize;

            v2f vert (appdata v) {
                v2f o;
                o.vertex = UnityObjectToClipPos(v.vertex);
                o.uv = TRANSFORM_TEX(v.uv, _MainTex);
                return o;
            }

            fixed4 frag (v2f i) : SV_Target {
                float4 grid = lerp(tex2D(_MainTex, i.uv),
                                   _LineColor,
                                   saturate(
                                       (frac(i.uv.x * (_SplitCount + _LineSize)) < _LineSize) +
                                       (frac(i.uv.y * (_SplitCount + _LineSize)) < _LineSize)
                                    )
                                );
                return grid;
            }

            ENDCG
        }
    }
}
グリッドの説明に関しては割愛させて頂きます。
詳しくは上記のサイト様を参考にしてください。
グリッドの見た目は、以下画像のようになれば問題ないです。
見た目

プロパティ

左右に揺らす
ソースコード
fixed4 frag (v2f i) : SV_Target {
    float2 uv = i.uv;
    float x = 2 * uv.y + sin(_Time.y * 5);
    uv.x += sin(_Time.y * 10) * 0.1 * sin(5 * x) * (-(x - 1) * (x - 1) + 1);
    float4 grid = lerp(tex2D(_MainTex, uv),
                        _LineColor,
                        saturate(
                            (frac(uv.x * (_SplitCount + _LineSize)) < _LineSize) +
                            (frac(uv.y * (_SplitCount + _LineSize)) < _LineSize)
                        )
                    );
    return grid;
}
結果

膨らみを持たせて揺らす
ソースコード
fixed4 frag (v2f i) : SV_Target {
    float2 uv = i.uv;
    uv *= 1.0 + 0.1 * sin(uv.x * 5.0 + _Time.z) + 0.1 * sin(uv.y * 3.0 + _Time.z);
    float4 grid = lerp(tex2D(_MainTex, uv),
                        _LineColor,
                        saturate(
                            (frac(uv.x * (_SplitCount + _LineSize)) < _LineSize) +
                            (frac(uv.y * (_SplitCount + _LineSize)) < _LineSize)
                        )
                    );
    return grid;
}
結果

中央に膨らます
ソースコード
fixed4 frag (v2f i) : SV_Target {
    float2 uv = i.uv - 0.5;
    uv *= 1.0 + 15 * pow(length(i.uv - 0.5), 2);
    uv += 0.5;
    float4 grid = lerp(tex2D(_MainTex, uv),
                        _LineColor,
                        saturate(
                            (frac(uv.x * (_SplitCount + _LineSize)) < _LineSize) +
                            (frac(uv.y * (_SplitCount + _LineSize)) < _LineSize)
                        )
                    );
    return grid;
}
結果

ソースコード
円のRGBを変化させながら揺れる
Shader "Unlit/Drawing_6" {
    Properties {
        _MainTex ("Texture", 2D) = "white" {}
    }
    SubShader {
        Tags { "RenderType"="Opaque" }

        Pass {
            CGPROGRAM
            #pragma vertex vert
            #pragma fragment frag

            #include "UnityCG.cginc"

            struct appdata {
                float4 vertex : POSITION;
                float2 uv : TEXCOORD0;
            };

            struct v2f {
                float2 uv : TEXCOORD0;
                float4 vertex : SV_POSITION;
            };

            sampler2D _MainTex;
            float4 _MainTex_ST;


            v2f vert (appdata v) {
                v2f o;
                o.vertex = UnityObjectToClipPos(v.vertex);
                o.uv = TRANSFORM_TEX(v.uv, _MainTex);
                return o;
            }

            float circle(float2 uv) {
                return step(0.3, distance(0.5, uv));
            }

            fixed4 frag (v2f i) : SV_Target {
                float2 uv = i.uv;
                // 歪みの計算
                float x = 2 * uv.y + sin(_Time.y * 5);
                float distort = sin(_Time.y * 10) * 0.1 * sin(5 * x) * (-(x - 1) * (x - 1) + 1);
                // 座標を歪ませる
                uv.x += distort;
                // RGBごとに少しずつ座標をずらす
                return float4(circle(uv - float2(0, distort) * 0.3),
                              circle(uv + float2(0, distort) * 0.3),
                              circle(uv + float2(distort, 0) * 0.3),
                              1);
            }

            ENDCG
        }
    }
}
グリットでの揺れ3種類
Shader "Unlit/Drawing_7" {
    Properties {
        // textureのオフセットとスケールを非表示にする
        [NoScaleOffset]_MainTex ("Texture", 2D) = "white" {}
        _LineColor ("Line Color", Color) = (1, 1, 1, 1)
        // rangeをintで調整できるように
        [IntRange] _SplitCount ("Split Count", Range(1, 30)) = 10
        _LineSize ("Line Size", Range(0.01, 1)) = 1
    }
    SubShader {
        Tags { "RenderType"="Opaque" }

        Pass {
            CGPROGRAM
            #pragma vertex vert
            #pragma fragment frag

            #include "UnityCG.cginc"

            struct appdata {
                float4 vertex : POSITION;
                float2 uv : TEXCOORD0;
            };

            struct v2f {
                float2 uv : TEXCOORD0;
                float4 vertex : SV_POSITION;
            };

            sampler2D _MainTex;
            float4 _MainTex_ST;
            fixed4 _LineColor;
            float _SplitCount;
            float _LineSize;

            // 左右に揺らす
            float2 LeftRightDist(float2 uv) {
                float x = 2 * uv.y + sin(_Time.y * 5);
                uv.x += sin(_Time.y * 10) * 0.1 * sin(5 * x) * (-(x - 1) * (x - 1) + 1);
                return uv;
            }

            // 膨らみを持たせて揺らす
            float2 BulgeDist(float2 uv) {
                return uv *= 1.0 + 0.1 * sin(uv.x * 5.0 + _Time.z) + 0.1 * sin(uv.y * 3.0 + _Time.z);
            }

            // 中央に膨らます
            float2 BulgeCenter(float2 uv) {
                float2 tempUv = uv - 0.5;
                tempUv *= 1.0 + 15 * pow(length(uv - 0.5), 2);
                return tempUv += 0.5;
            }

            v2f vert (appdata v) {
                v2f o;
                o.vertex = UnityObjectToClipPos(v.vertex);
                o.uv = TRANSFORM_TEX(v.uv, _MainTex);
                return o;
            }

            fixed4 frag (v2f i) : SV_Target {
                // ここの関数を変更することで歪みを変更できる
                float2 uv = BulgeCenter(i.uv);
                // グリット処理
                float4 grid = lerp(tex2D(_MainTex, uv),
                                   _LineColor,
                                   saturate(
                                       (frac(uv.x * (_SplitCount + _LineSize)) < _LineSize) +
                                       (frac(uv.y * (_SplitCount + _LineSize)) < _LineSize)
                                    )
                                );
                return grid;
            }


            ENDCG
        }
    }
}
今回は以上となります。
ここまでご視聴ありがとうございました。