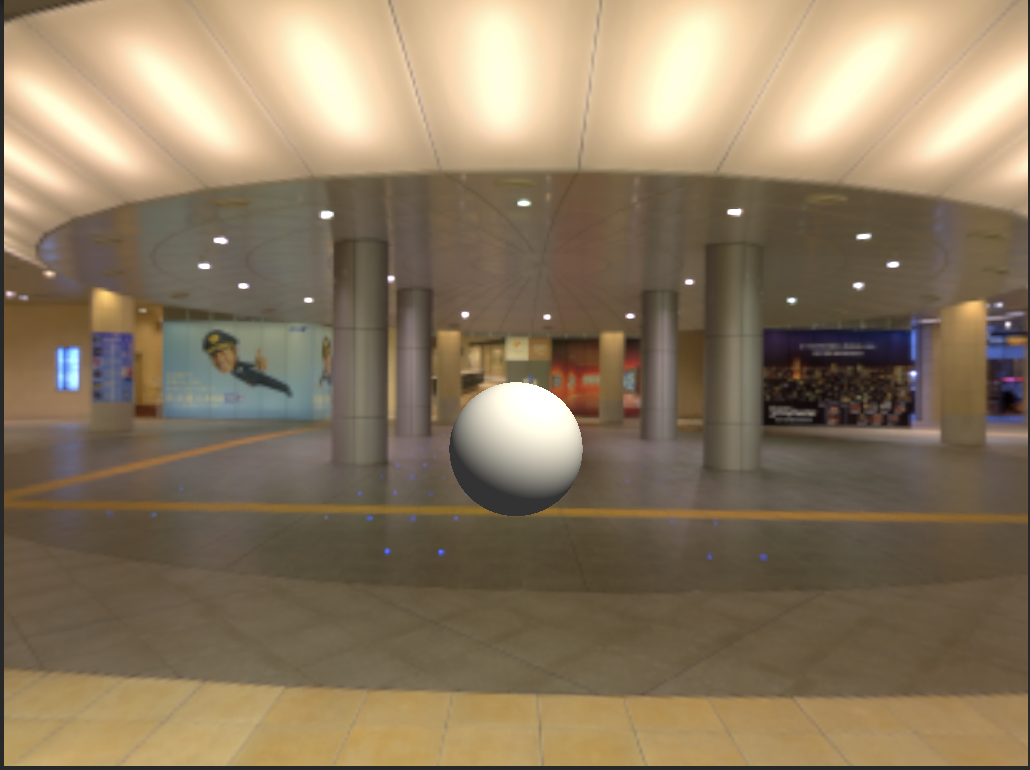
【UnityShader】レイマーチング入門【3】 #34
前回の成果
微分について理解した。
今回やること
前回のレイマーチングの続きで、ライティングを理解していきます。
ソースコード
Shader "Unlit/lightingRaymarching" {
    Properties {
        _MainTex ("Texture", 2D) = "white" {}
        _Radius("Radius", Range(0.0, 1.0)) = 0.3
    }
    SubShader {
        Tags { "Queue"="Transparent" "LightMode"="ForwardBase"}
        LOD 100

        Pass {
            ZWrite On
            Blend SrcAlpha OneMinusSrcAlpha

            CGPROGRAM
            #pragma vertex vert
            #pragma fragment frag

            #include "UnityCG.cginc"
            #include "Lighting.cginc"

            struct appdata {
                float4 vertex : POSITION;
                float2 uv : TEXCOORD0;
            };

            struct v2f {
                float2 uv : TEXCOORD0;
                float4 pos : POSITION1;
                float4 vertex : SV_POSITION;
            };

            sampler2D _MainTex;
            float4 _MainTex_ST;
            float _Radius;

            float sphere(float3 pos) {
                return length(pos) - _Radius;
            }

            float3 getNormal(float3 pos) {
                float d = 0.001;
                return normalize(float3(
                    sphere(pos + float3(d, 0, 0)) - sphere(pos + float3(-d, 0, 0)),
                    sphere(pos + float3(0, d, 0)) - sphere(pos + float3(0, -d, 0)),
                    sphere(pos + float3(0, 0, d)) - sphere(pos + float3(0, 0, -d))));
            }

            v2f vert (appdata v) {
                v2f o;
                o.vertex = UnityObjectToClipPos(v.vertex);
                o.pos = mul(unity_ObjectToWorld, v.vertex);
                o.uv = v.uv;
                return o;
            }

            fixed4 frag (v2f i) : SV_Target {
                float3 pos = i.pos.xyz;
                float3 rayDir = normalize(pos.xyz - _WorldSpaceCameraPos);
                int stepNum = 30;

                for (int i = 0; i < stepNum; i++) {
                    float marcingDist = sphere(pos);
                    if (marcingDist < 0.001) {
                        float3 lightDir = _WorldSpaceLightPos0.xyz;
                        float3 normal = getNormal(pos);
                        float3 lightColor = _LightColor0;
                        fixed4 col = fixed4(lightColor * max(dot(normal, lightDir), 0), 1.0);
                        col.rgb += fixed3(0.2f, 0.2f, 0.2f);
                        return col;
                    }
                    pos.xyz += marcingDist * rayDir.xyz;
                }
                return 0;
            }
            ENDCG
        }
    }
}
もう一度添付しておきます。
偏微分
多変数関数に対して一つの変数のみに関する(それ以外の変数は定数として固定する)微分である
多変数関数とは複数の変数によって値が決まるのような関数のことです。
では、実際の数値を用いて偏微分をしてみます。
値を入れてみる
を偏微分していきます。
についての偏微分は
などの記号で表されます。
となります。
同じようにも行うと
となります。
偏微分の定義
前回の記事で、
導関数の定義は、
と表しました。
偏微分は一つの変数以外定数として固定するので、
となります。
距離函数を使った法線の公式である以下の式と、
の偏微分の定義をもう一度思い出してください。
このことから、法線の公式にの偏微分を代入してあげると、getNormalと同じとなります。
なので、この関数で法線が取れます。
float3 getNormal(float3 pos) {
    float d = 0.001;
    return normalize(float3(
        sphere(pos + float3(d, 0, 0)) - sphere(pos + float3(-d, 0, 0)),
        sphere(pos + float3(0, d, 0)) - sphere(pos + float3(0, -d, 0)),
        sphere(pos + float3(0, 0, d)) - sphere(pos + float3(0, 0, -d))));
}
_WorldSpaceLightPos0
これはライトの位置になります。
詳しくはこちらを参照してください。
_LightColor0
ライトの色です。
ライティングの処理
ここの部分で処理を行っています。
fixed4 col = fixed4(lightColor * max(dot(normal, lightDir), 0), 1.0);
col.rgb += fixed3(0.2f, 0.2f, 0.2f);
1行目はランバート反射の計算をしています。
ランバート反射とは噛み砕いて説明すると、
光源(黄色の矢印)があると、暗くなる部分(ピンクの矢印)が生まれる反射のことです。
ランバート反射は
ランバート反射 = ライトの色 * dot(面の法線 * ライトのベクトル) + 環境光
で表すことができるので、
fixed4 col = fixed4(lightColor * max(dot(normal, lightDir), 0), 1.0);
col.rgb += fixed3(0.2f, 0.2f, 0.2f);
で表現できます。
maxを使用しているのは、暗くなりすぎないようにしているからで好みです。
max使用時

max 非使用時

結果
ライティングが出れば成功です。

ソースコードにコメントを付与
Shader "Unlit/lightingRaymarching" {
    Properties {
        _MainTex ("Texture", 2D) = "white" {}
        _Radius("Radius", Range(0.0, 1.0)) = 0.3
    }
    SubShader {
        Tags { "Queue"="Transparent" "LightMode"="ForwardBase"}
        LOD 100

        Pass {
            ZWrite On
            Blend SrcAlpha OneMinusSrcAlpha

            CGPROGRAM
            #pragma vertex vert
            #pragma fragment frag

            #include "UnityCG.cginc"
            #include "Lighting.cginc"

            struct appdata {
                float4 vertex : POSITION;
                float2 uv : TEXCOORD0;
            };

            struct v2f {
                float2 uv : TEXCOORD0;
                float4 pos : POSITION1;
                float4 vertex : SV_POSITION;
            };

            sampler2D _MainTex;
            float4 _MainTex_ST;
            float _Radius;

            // 中心との距離から円を描画
            float sphere(float3 pos) {
                return length(pos) - _Radius;
            }

            // 法線を取得
            float3 getNormal(float3 pos) {
                // δ
                float d = 0.001;
                // 法線の公式より、各変数の偏微分から計算
                return normalize(float3(
                    sphere(pos + float3(d, 0, 0)) - sphere(pos + float3(-d, 0, 0)),
                    sphere(pos + float3(0, d, 0)) - sphere(pos + float3(0, -d, 0)),
                    sphere(pos + float3(0, 0, d)) - sphere(pos + float3(0, 0, -d))));
            }

            v2f vert (appdata v) {
                v2f o;
                o.vertex = UnityObjectToClipPos(v.vertex);
                o.pos = mul(unity_ObjectToWorld, v.vertex);
                o.uv = v.uv;
                return o;
            }

            fixed4 frag (v2f i) : SV_Target {
                float3 pos = i.pos.xyz;
                // レイのベクトル
                float3 rayDir = normalize(pos.xyz - _WorldSpaceCameraPos);
                int stepNum = 30;

                for (int i = 0; i < stepNum; i++) {
                    // レイを進める距離
                    float marcingDist = sphere(pos);
                    // 衝突検知
                    if (marcingDist < 0.001) {
                        float3 lightDir = _WorldSpaceLightPos0.xyz;
                        float3 normal = getNormal(pos);
                        float3 lightColor = _LightColor0;
                        // 内積によって色を変化させる
                        fixed4 col = fixed4(lightColor * max(dot(normal, lightDir), 0), 1.0);
                        // 環境光のオフセット
                        col.rgb += fixed3(0.2f, 0.2f, 0.2f);
                        return col;
                    }
                    // レイを進める
                    pos.xyz += marcingDist * rayDir.xyz;
                }
                // stepNum回レイを進めても衝突しなかったらピクセルを透明にする
                return 0;
            }
            ENDCG
        }
    }
}
今回は以上となります。
ここまでご視聴ありがとうございました。
