【UnityShader】カメラからのエフェクト #68
前回の成果
CommandBufferを用いてブラーをかけることができた。
今回やること
カメラを用いて、エフェクトを制作します。
今回は、解説というよりは見せ方として参考になるので共有に近いです。
事前準備
Scene上に適当なオブジェクトを配置します。

メインのカメラに今回制作したScriptをアタッチして準備完了です。

自分が使用したアセットは以下になります。
ソースコード
Scripts側
using UnityEngine;

namespace CameraNoise {
    public class RightLeftNoise : MonoBehaviour {
        [SerializeField]
        private Shader _shader;

        // 横にズレる値
        [SerializeField, Range(0, 1)]
        private float _horizonValue;
        private Material _material;

        void Awake() {
            Initialize();
        }

        /// <summary>
        /// 全てのレンダリングがRenderImageへと完了したとき
        /// </summary>
        /// <param name="src">コピー元</param>
        /// <param name="dest">コピー先</param>
        void OnRenderImage(RenderTexture src, RenderTexture dest) {
            // マテリアルが存在していない場合、生成する
            if (_material == null) {
                Initialize();
            }
            // フレームカウントでシード値の設定
            _material.SetInt("_Seed", Time.frameCount);
            _material.SetFloat("_HorizonValue", _horizonValue);
            // 描画
            Graphics.Blit(src, dest, _material);
        }

        /// <summary>
        /// 初期化
        /// </summary>
        private void Initialize() {
            // マテリアルの生成
            _material = new Material(_shader);
            _material.hideFlags = HideFlags.DontSave;
        }
    }
}
Shader側
Shader "Unlit/RightLeftNoise" {
    Properties {
        _MainTex ("Texture", 2D) = "white" {}
    }
    SubShader {
        Tags { "RenderType"="Opaque" }
        LOD 100

        Pass {
            CGPROGRAM
            #pragma vertex vert
            #pragma fragment frag

            #include "UnityCG.cginc"

            struct appdata {
                float4 vertex : POSITION;
                float2 uv : TEXCOORD0;
            };

            struct v2f {
                float2 uv : TEXCOORD0;
                float4 vertex : SV_POSITION;
            };

            sampler2D _MainTex;
            float4 _MainTex_ST;
            float _HorizonValue;
            int _Seed;

            // 乱数生成
            float rand(float2 value, int seed) {
                return frac(sin(dot(value, fixed2(12.9898f, 78.233f)) + seed) * 43758.5453);
            }

            v2f vert (appdata v) {
                v2f o;
                o.vertex = UnityObjectToClipPos(v.vertex);
                o.uv = TRANSFORM_TEX(v.uv, _MainTex);
                return o;
            }

            fixed4 frag (v2f i) : SV_Target {
                float random = rand(i.uv, _Seed);
                // -1か1を返す
                int tmp = step(random, 0.5) * 2 - 1;
                float randomValue = _HorizonValue * tmp * random;
                float2 uv = float2(frac(i.uv.x + randomValue), i.uv.y);
                fixed4 col = tex2D(_MainTex, uv);
                return col;

            }
            ENDCG
        }
    }
}
今回、特に難しいものはないので説明は割愛させて頂きます。
結果
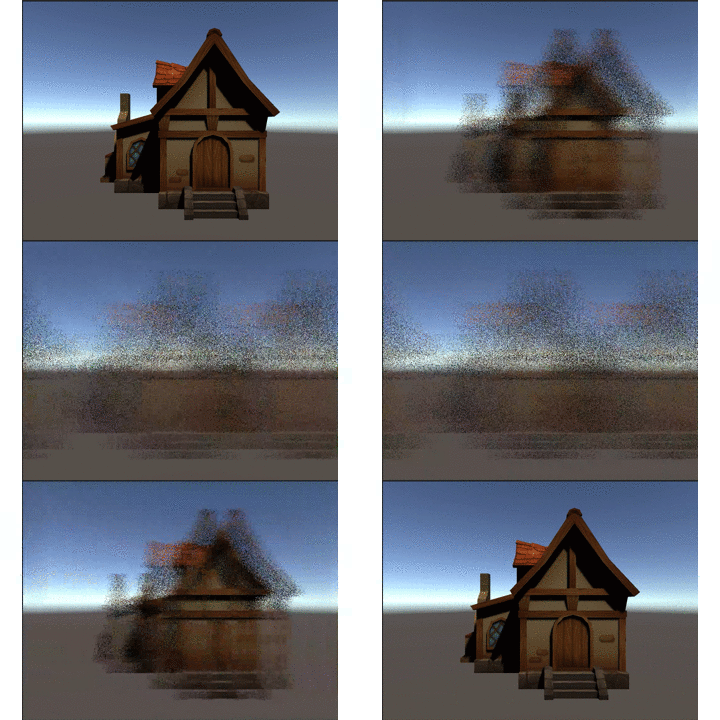
_horizonValueの値を変化させ、左右にノイズがかかれば成功です。

もう一つ共有しようと思います。
カメラからのブラー
こちらのサイト様を参考にさせて頂きました。
事前の準備に関しては上のものと同じとなります。
ソースコード
Script側
using UnityEngine;
using System.Collections.Generic;

namespace CameraNoise {
    public class FlameNoise : MonoBehaviour {
        [SerializeField]
        private Shader _shader;
        private Material _material;
        private List<RenderTexture> _textureList = new List<RenderTexture>();

        void Awake() {
            Initialize();
        }

        /// <summary>
        /// 全てのレンダリングがRenderImageへと完了したとき
        /// </summary>
        /// <param name="src">コピー元</param>
        /// <param name="dest">コピー先</param>
        void OnRenderImage(RenderTexture src, RenderTexture dest) {
            // マテリアルが存在していない場合、生成する
            if (_material == null) {
                Initialize();
            }
            // 配列の用意
            int width = src.width;
            int height = src.height;
            const int FLAME_NUM = 3;
            for (int i = 0; i < FLAME_NUM; i++) {
                _textureList.Add(new RenderTexture(width, height, 0, RenderTextureFormat.RGB565));
            }

            // 1フレームずつズラしたものをコピーする
            RenderTexture tmpTexture = _textureList[Time.frameCount % FLAME_NUM];
            Graphics.Blit(src, tmpTexture);
            for (int i = 0; i < _textureList.Count; i++) {
                _material.SetTexture("_Tex" + i.ToString(), _textureList[i]);
            }
            // 描画
            Graphics.Blit(src, dest, _material);
        }

        /// <summary>
        /// 初期化
        /// </summary>
        private void Initialize() {
            // マテリアルの生成
            _material = new Material(_shader);
            _material.hideFlags = HideFlags.DontSave;
        }
    }
}
Shader側
Shader "Unlit/FlameNoise" {
    Properties {
        _MainTex ("Texture", 2D) = "white" {}
    }
    SubShader {
        Tags { "RenderType"="Opaque" }
        LOD 100

        Pass {
            CGPROGRAM
            #pragma vertex vert
            #pragma fragment frag

            #include "UnityCG.cginc"

            struct appdata {
                float4 vertex : POSITION;
                float2 uv : TEXCOORD0;
            };

            struct v2f {
                float2 uv : TEXCOORD0;
                float4 vertex : SV_POSITION;
            };

            sampler2D _MainTex;
            float4 _MainTex_ST;
            sampler2D _Tex0;
            sampler2D _Tex1;
            sampler2D _Tex2;

            v2f vert (appdata v) {
                v2f o;
                o.vertex = UnityObjectToClipPos(v.vertex);
                o.uv = TRANSFORM_TEX(v.uv, _MainTex);
                return o;
            }

            fixed4 frag (v2f i) : SV_Target {
                fixed4 col = tex2D(_MainTex, i.uv) * 0.25;
                fixed4 col0 = tex2D(_Tex0, i.uv) * 0.25;
                fixed4 col1 = tex2D(_Tex1, i.uv) * 0.25;
                fixed4 col2 = tex2D(_Tex2, i.uv) * 0.25;
                return col + col0 + col1 + col2;

            }
            ENDCG
        }
    }
}
こちらに関しても、難しいものはないので説明は割愛させて頂きます。
結果
移動した箇所にブラーがかかれば成功です。
参考サイト様のUnityちゃんのアニメーションが分かりやすいのでそちらもご確認してみてください。

今回は以上となります。
ここまでご視聴ありがとうございました。